Purchasing an Akiya (abandoned house) is a dream for many looking to live or invest in Japan. However, the biggest concern for any prospective buyer is undoubtedly seismic resistance.
To enjoy your traditional Japanese home with peace of mind, it must meet modern safety standards. In this guide, we break down the history of Japan’s building codes, specific reinforcement methods, and the costs involved in securing an Akiya.
1. Understanding the Standards: “Kyushin” vs. “Shin-Taishin”
Japanese buildings are categorized by the era in which they were built. Knowing this date is the first step in assessing your Akiya:
- Old Seismic Standard (Pre-June 1981): Known as Kyushin, these buildings were designed to withstand Level 5 earthquakes. Most Akiyas fall into this category and require significant upgrades.
- New Seismic Standard (Post-June 1981): Known as Shin-Taishin, these are designed to prevent collapse during Level 6-7 earthquakes.
- The 2000 Standard: A further update for wooden houses that mandated soil checks and specific metal connectors for pillars.
The Rule of Thumb: If the house was built before 1981, a professional “Seismic Diagnosis” is non-negotiable.
2. Steps to Retrofit an Akiya for Safety
The process of making an Akiya earthquake-ready generally follows these three stages:
① Seismic Diagnosis (Inspection)
A licensed architect or inspector evaluates the home’s structure, checking the foundation, wall placement, and potential termite damage. They provide a score (Seismic Evaluation Score):
- 1.0 or higher: Generally safe.
- Below 0.7: High risk of collapse during a major quake.
② Structural Design
Based on the diagnosis, a plan is created to determine where to add shear walls, reinforce pillars, or upgrade the foundation.
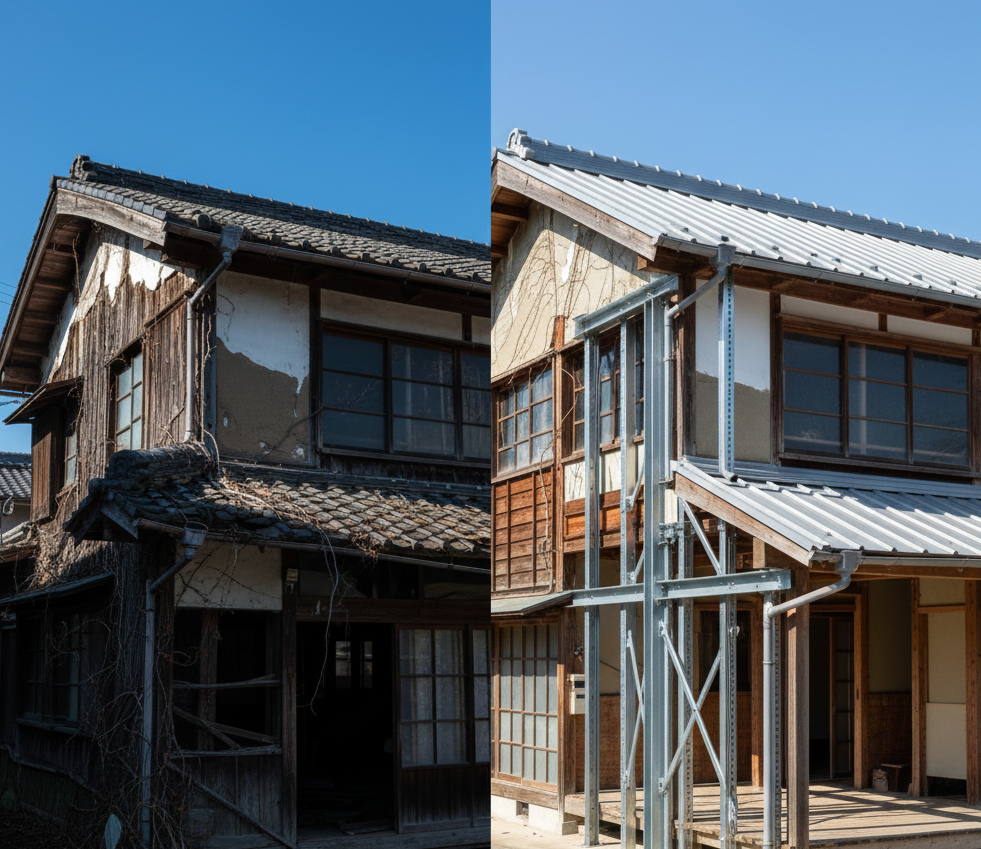
③ Retrofitting Works
Common construction methods include:
- Wall Reinforcement: Adding braces (sujikai) or structural plywood to increase lateral strength.
- Foundation Strengthening: Adding steel-reinforced concrete to old “unreinforced” foundations or repairing deep cracks.
- Metal Connectors: Using specialized steel hardware to securely bolt pillars to the beams and foundation.
- Roof Lightening: Replacing heavy traditional clay tiles with lightweight materials like Galvalume (metal). This lowers the building’s center of gravity, significantly reducing swaying.
3. Estimated Costs: How Much Should You Budget?
Costs vary based on the house’s size and condition, but here are the general benchmarks:
| Service / Work | Estimated Cost (JPY) | Estimated Cost (USD approx.) |
| Seismic Diagnosis | ¥100,000 – ¥300,000 | $700 – $2,000 |
| Retrofit Design | ¥150,000 – ¥400,000 | $1,000 – $2,700 |
| Standard Retrofitting | ¥1,000,000 – ¥2,500,000 | $7,000 – $17,000 |
| Full Structural Overhaul | ¥5,000,000+ | $35,000+ |
Pro Tip: Combine seismic work with cosmetic renovations (like replacing flooring or kitchens) to save on labor and demolition costs.
4. Leveraging Government Subsidies
The Japanese government and local municipalities actively encourage the retrofitting of old homes. You can often find:
- Diagnosis Subsidies: Many cities cover 50% to 100% of the inspection cost.
- Construction Grants: You may receive between ¥500,000 and ¥1.5 million toward the actual retrofitting work.
- Tax Incentives: Deductions on income tax and reductions in fixed asset (property) tax are often available for earthquake-proofed homes.
Important: Most subsidies must be applied for before you sign a contract or start construction. Always consult the local city hall (Shiyakusho) first.
5. Conclusion
Transforming an Akiya from a “liability” into a “valuable asset” requires a focus on safety. By following the proper diagnostic steps and utilizing government grants, you can preserve the charm of traditional Japanese architecture while ensuring it stands strong for decades to come.